 ApostropheCMS
Building site navigation
Almost every website needs some kind of primary navigation. For Apostrophe sites there are two main approaches to adding and maintaining site navigation:
- Use the page tree to automatically generate navigation for pages
- Manually build the site nav using an array field
INFO
This code recipe discusses specifically how to build site-wide navigation. Keep in mind that the same concepts can be applied to build other kinds of navigation, including nav for certain sections of at website or contextual nav for a page's children.
Generating site navigation from the page tree
One of the defining features of pages in Apostrophe is that they exist in a hierarchy. Even if we added all pages on a website as siblings (the same hierarchy level) they would still all be children of the home page. This structure is expressed through the page tree.
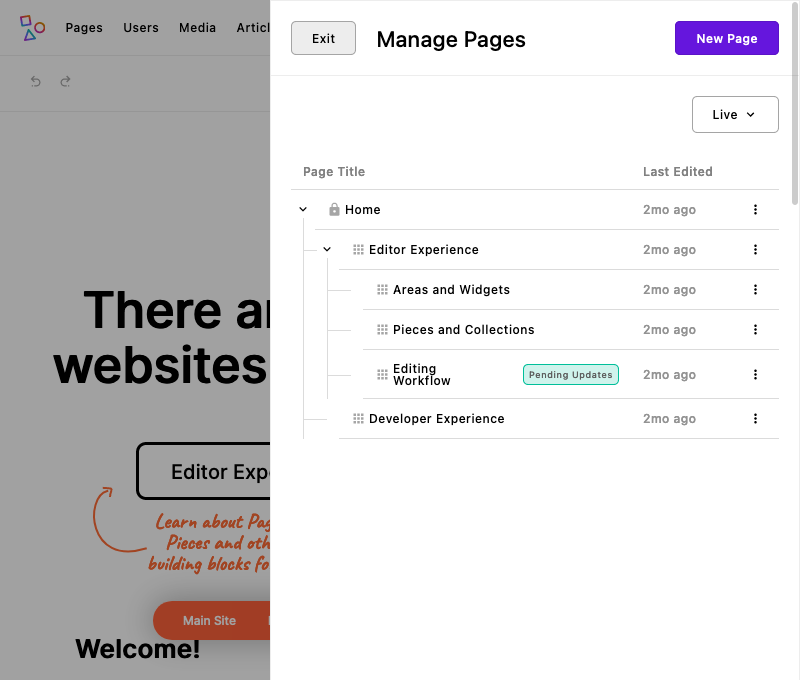
The Apostrophe demo site is a small example of common page tree structure. Under the home page there are two top-level pages. One of those pages, "Editor Experience," has three additional child pages, making it their parent page. These pages can all be rearranged through drag-and-drop interaction.
Apostrophe templates have access to this page tree using data.home._children, an array of top-level page data objects. Templates also have access to the children of the page a visitor is on, but since we're focused on the main site navigation, we want to use the home page's children. Home page children do not change as visitors move around the website.
As explained on the pages guide, we can loop over data.home._children and print the pages' URLs and titles in a list. Once you add some classes and CSS, this can work great as site navigation. And since it is based on the page tree structure it will automatically stay up to date as editors update page content.
<header>
  <nav>
    <ul>
      {# 👇 Referencing `data.home._children` and looping over them. #}
      {% for page in data.home._children %}
        <li>
          <a href="{{ page._url }}">{{ page.title }}</a>
        </li>
      {% endfor %}
    </ul>
  </nav>
</header>
Change page tree data in templates
The example above is a very simple site navigation. It includes only the top-level pages and the basic data available for each page. In some cases you may want different data from the page tree for your navigation. The direct way to do this is to alter the query builders that the core page module uses to get that data.
The default query builder options for the page module look like this:
module.exports = {
  options: {
    builders: {
      children: true,
      ancestors: {
        children: true
      }
    }
  }
}
For example, to include two levels of pages in template ancestor data we would add to the builders option that ancestors (such as the home page) should include two levels of child pages (depth: 2).
module.exports = {
  options: {
    builders: {
      children: true,
      // `ancestors` includes the home page, so we adjust things there.
      ancestors: {
        children: {
          depth: 2
        }
      }
    }
  }
}
INFO
If using the depth: 2 builder option, the each page in the data.home._children array will include their own _children array with any child pages, if they have any.
By default the page data object includes all properties from the database document. We can limit that returned data (for a minor speed improvement and clearer logging). One good approach to this is to set areas: false and relationships: false to remove area and relationship field data, which can get large.
module.exports = {
  options: {
    builders: {
      children: true,
      ancestors: {
        children: {
          depth: 2,
          areas: false,
          relationships: false
        }
      }
    }
  }
}
If pages had thumbnail images we wanted to show in the navigation, we can include that as well. If we had added an area field called thumbnail to the page schema, we could adjust our areas option to only include that one area field by name. (The relationship field data from the image widget isn't stored directly on the page.)
module.exports = {
  options: {
    builders: {
      children: true,
      ancestors: {
        children: {
          depth: 2,
          // 👇 Now including the area data
          areas: [ 'thumbnail' ],
          relationships: false
        }
      }
    }
  }
}
We would then display the image using an area tag or the template methods for accessing the image attachment.
As you can see, page templates come ready with page tree data that is ready to become site navigation. With additional configuration, we can customize the data that templates give us. The examples above are only a few such ways to configure it.
Add fields for manual nav building
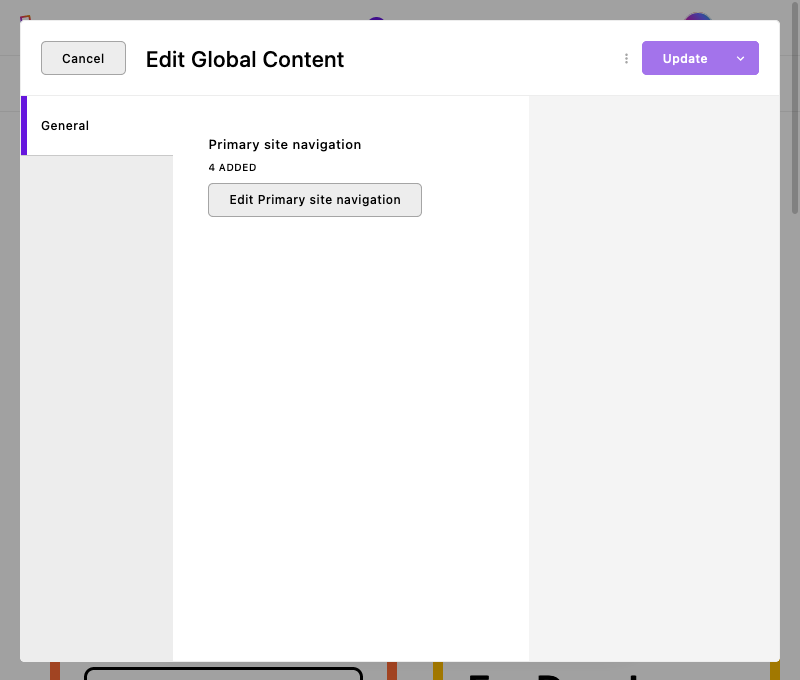
The other common approach to site navigation is to let editors build it manually. They would be able to choose the specific page links and the order in which the links should appear. Since the site nav is the same across every page (in most cases), we store the navigation data in global settings.
Before we look at a code example, let's think about how we would want to define fields for site navigation.
- Website navigation is an ordered list of links, some of which might contain their own list of links (second-level navigation). This translates well to an array structure, so we use an
arrayfield. - Navigation items might usually be pages on the website, but they also might be external links, links to files, or even might not be links at all in order to prioritize a second-level navigation. We won't get into all of those cases, but this means that we want to let editors choose the navigation item type.
- Finally, each type of navigation item works differently. We will use conditional logic to only show the correct fields based on the chosen nav item type.
With those ideas in mind, we can look at an example of project-level global module configuration that adds a navigation array field. To keep this relatively simple this will only include two navigation item types.
module.exports = {
fields: {
add: {
// Adding our array field, `primaryNav`
primaryNav: {
label: 'Primary site navigation',
type: 'array',
titleField: 'label',
// The array schema for each item
fields: {
add: {
label: {
label: 'Nav item label',
type: 'string'
},
type: {
label: 'Link type',
type: 'select',
choices: [
{
label: 'Page',
value: 'page'
},
{
label: 'Custom URL',
value: 'custom'
}
]
},
_page: {
label: 'Page to link',
type: 'relationship',
withType: '@apostrophecms/page',
max: 1,
required: true,
builders: {
project: {
title: 1,
_url: 1
}
},
// Only if it's a page link
if: {
type: 'page'
}
},
customUrl: {
label: 'URL for custom link',
type: 'url',
required: true,
// Only if it's a custom link
if: {
type: 'custom'
}
},
// A nice option to have the link open in a new tab
target: {
label: 'Will the link open a new browser tab?',
type: 'checkboxes',
choices: [
{
label: 'Open in new tab',
value: '_blank'
}
]
}
}
}
}
}
}
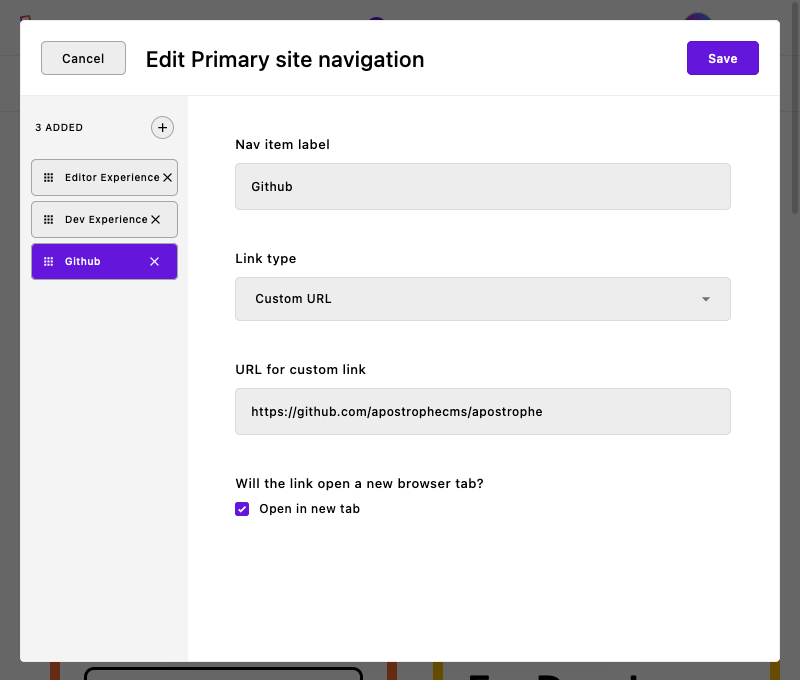
}The field schema above adds an array field whose schema has five additional fields (remember: array fields have their own field schema for each array item):
- The nav item label, which is also the array field's
titleFieldfor the user interface - The link type (linking to an internal page or external URL)
- A relationship field to an internal page, if the page link option is chosen
- A URL field, if the custom URL option is chosen
- An option to mark the link to open in a new tab (a nice option for editors to have)
The final step is to turn the array data from this into template markup. We will loop over the array of links and render the links based on what type they are. Page links are relationship data, so they are constructed differently from custom URL links, which are simply string values.
<header>
  <nav>
    <ul>
      {# 👇 Referencing the global doc `primaryNav` property #}
      {% for item in data.global.primaryNav %}
        <li>
          {% set path = '' %}
          {% set pageTitle = '' %}
          {% set selectedClass = '' %}
          {% if item.type === 'page' and item._page and item._page[0] %}
            {% set path = item._page[0]._url %}
            {% set pageTitle = item._page[0].title %}
            {% if data.page.title == pageTitle %}
              {% set selectedClass = 'selected' %}
            {% endif %}
          {% elif item.type === 'custom' %}
            {% set path = item.customUrl %}
          {% endif %}
          <a href="{{ path }}" class="{{ selectedClass }}"
            {% if item.target[0] === '_blank' %} target="_blank" {% endif %}
          >{{ item.label or pageTitle }}</a>
        </li>
      {% endfor %}
    </ul>
  </nav>
</header>
In addition to adding more link types to the schema, the template example can be changed depending on the project needs.
Constructing breadcrumb navigation
Breadcrumb navigation shows visitors the series of pages from the page they are on back to the home page. It could end with some other major landing page, but our example will lead back to the home page. To add bread crumbs to a page we use very similar techniques to those shown above for a website's primary navigation. Instead of using data.home, we use data.page._ancestors.
What is breadcrumb navigation, really? If we think through the pieces of breadcrumb nav, we are looking at: A series of links, usually starting with the home page, proceeding through the page tree, down to the page we are on.
data.page._ancestors perfectly matches this goal. It is an array of page objects, starting with the home page, continuing through the page tree and ending with the parent of the rendered page. Perfect! To turn that into a breadcrumb navigation, we simply need to loop through data.page._ancestors, add a link for each ancestor.
The only tricky part comes at the end. If a visitor is on a piece's show page, then data.page will actually be the index page. If data.piece exists (indicating we're rendering a show page), we will link to the index page (data.page) in the breadcrumbs, otherwise we'll simply print the current page's title.
{# Breadcrumb trail to the current page or piece. Not on the home page #}
{% if data.page and data.page._ancestors.length %}
  <nav class="breadcrumb">
    {# Loop over the ancestors. #}
    {% for page in data.page._ancestors %}
      <a href="{{ page._url }}">{{ page.title }}</a> ➡
    {% endfor %}
    {% if data.piece %}
      {# We're rendering a show page. #}
      <a href="{{ data.page._url }}">{{ data.page.title }}</a>  ➡
      <span>{{ data.piece.title }}</span>
    {% else %}
      {# We're rendering a normal page. #}
      <span>{{ data.page.title }}</span>
    {% endif %}
  </nav>
{% endif %}